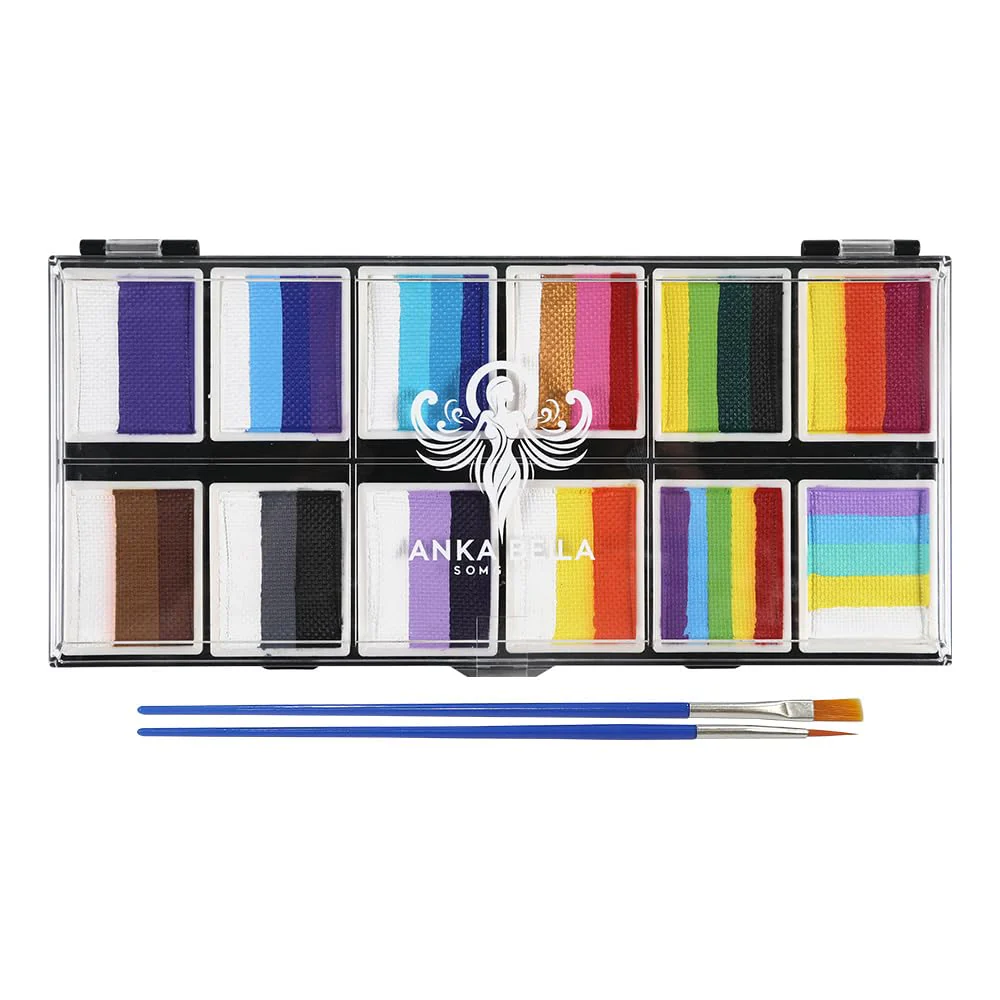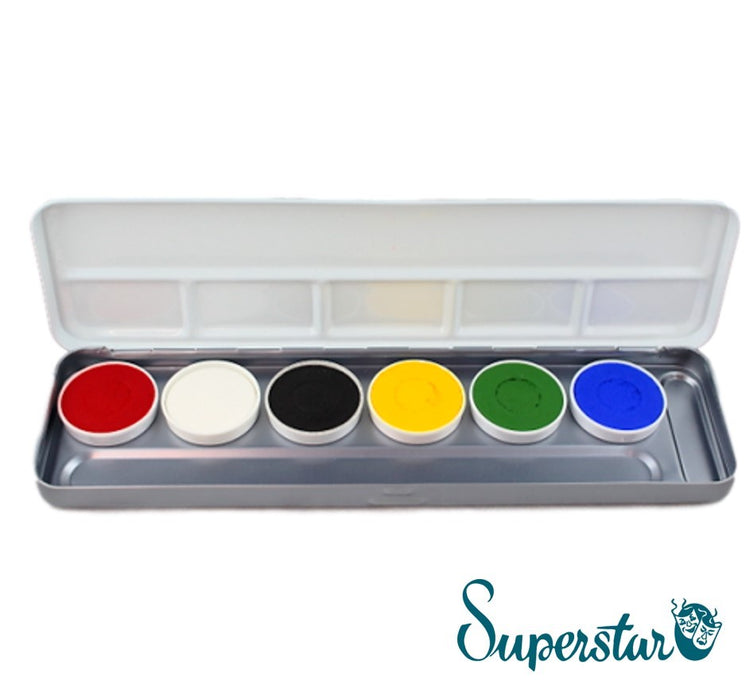
Six-piece paint tray
7 pieces in stock!
Nowadays, face painting is very popular, and not only for children, but also for adults.
Learning how to draw a face can not only be a fun activity to distract yourself and have fun with your children, but also a money-making skill that can help you feed your family.
If you want to become a professional face painter or just do it as a hobby, it's important to learn how to do face painting properly, using the right supplies, techniques, and proper hygiene so you can have fun and stay safe no matter what.
In this blog post, we will teach you the basics you need to know to get started with face painting. Once you've mastered the basics, you can browse our blog posts and learn all the extra details that will help you become a professional.
The structure of this article makes it easy for a complete beginner face painting to follow up and understand everything even without any prior knowledge or understanding of the subject.
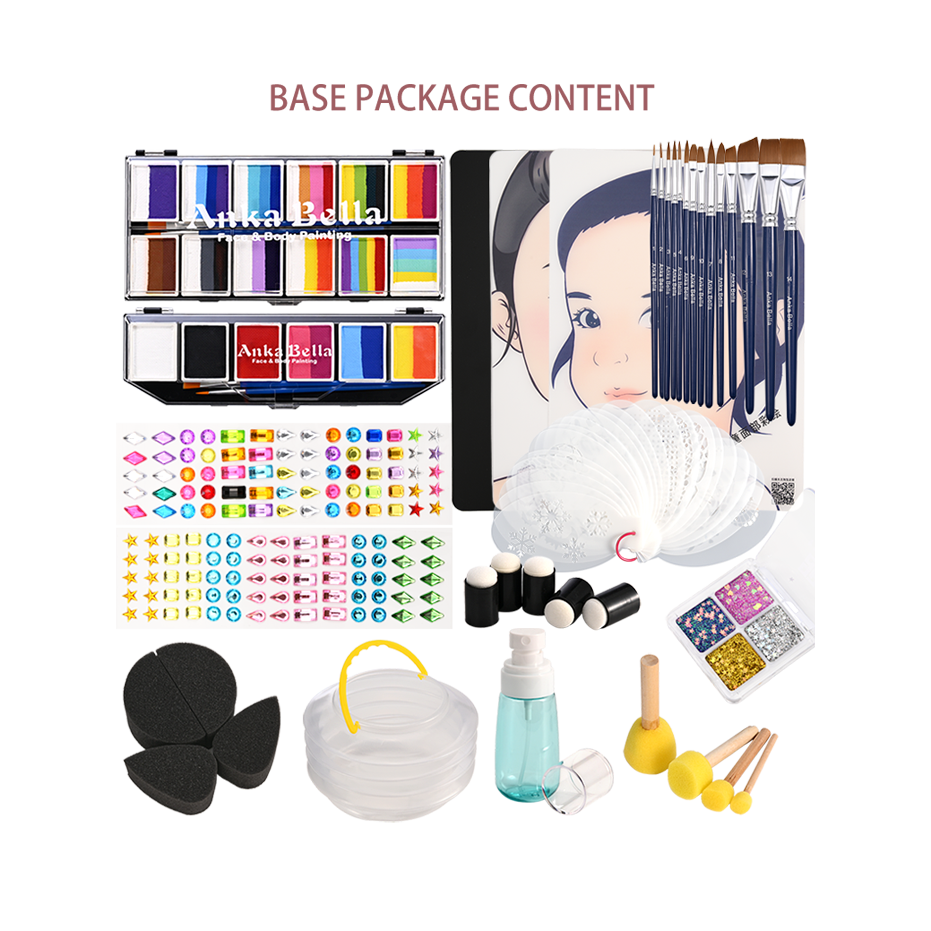
We will begin with a beginner's guide to face painting, covering the basic face painting supplies needed to learn face painting. This is not a professional setup, but a basic kit to get you started.
Then, we'll cover how to use face painting supplies, including how to activate face painting paints, how to properly load brushes and sponges, and how to use split cakes.
After that, we'll learn how to wash off face paint, how to clean suppliers, how to store them properly, and some safety and hygiene tips.
Once we have all this knowledge, we will teach you how to care for your gear and give you some fun practice tips so that you can continue to practice your face painting skills.
Paraffin and acacia based face paints are particularly good for line painting, while glycerin based face paints are better for blending because they are more flexible and take longer to dry on the skin.
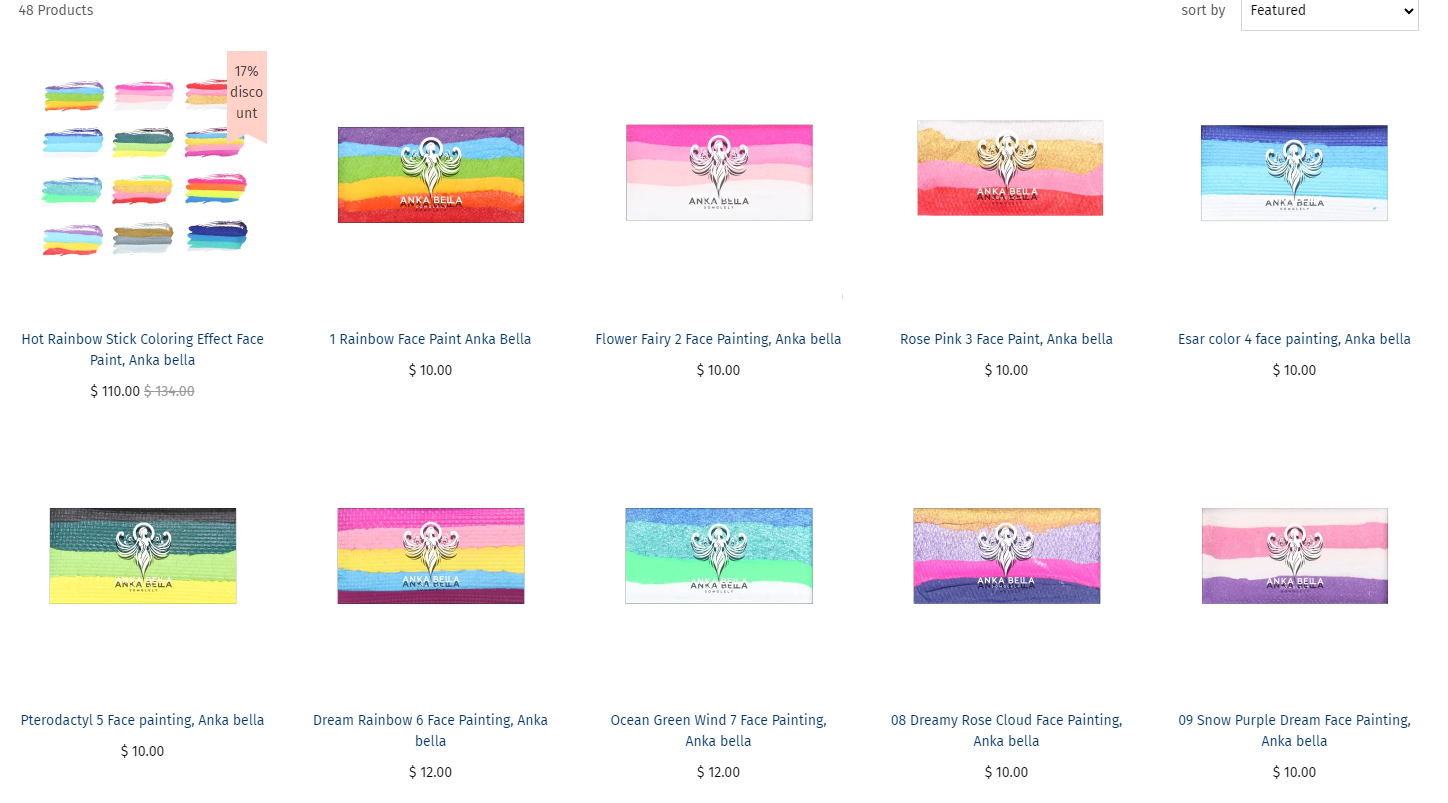
To start your face painting journey, you need to get the right supplies, and you should always buy face painting from a professional face painting store. There are many professional face painting shops online and we run our own shop. With over 30 years of experience in professional face painting, we have first-hand knowledge of the products we sell and we can recommend the products that best suit your needs.

We recommend visiting our store at www.anka-bella.com to find out what we have to offer, but we'll list below what we think are good face painting kits for beginners.
There are three basic styles of face painting:
1:Matte or plain colors: These colors are bright and can have a matte or glossy effect. They are great because they offer the best coverage and the most colorful look.
2:Pearly or metallic: These colors are made from special pigments, so they look metallic or pearly. They have a shiny or metallic effect and are perfect for adding luster to your designs.
3:UV or neon colors: These colors are so bright that they look like they glow in daylight and glow under black light as well. They are great for creating special effects and making designs pop, but they can be a bit translucent, so a thicker load is required to provide good coverage.
7 pieces in stock!
或者
10+ in stock!
Both of these palettes are good choices, depending on your budget. They have the most basic face paint colors. With them, you can draw almost any pattern you want. Sure, they're small, so they're great for practicing, having fun, and learning how to face paint, but if you decide to do this professionally, then you'll need something bigger.
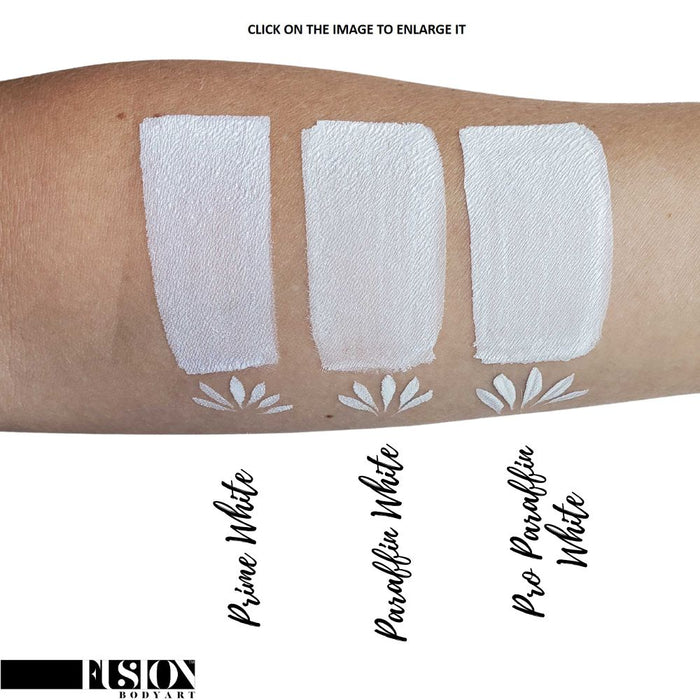
The colors you should definitely have when you're just starting out are:
You'll notice that since almost every design uses black and white, you'll be using black and white most often, so you may need to get larger containers, such as these:
There are 2 pieces in stock!
10+ in stock!
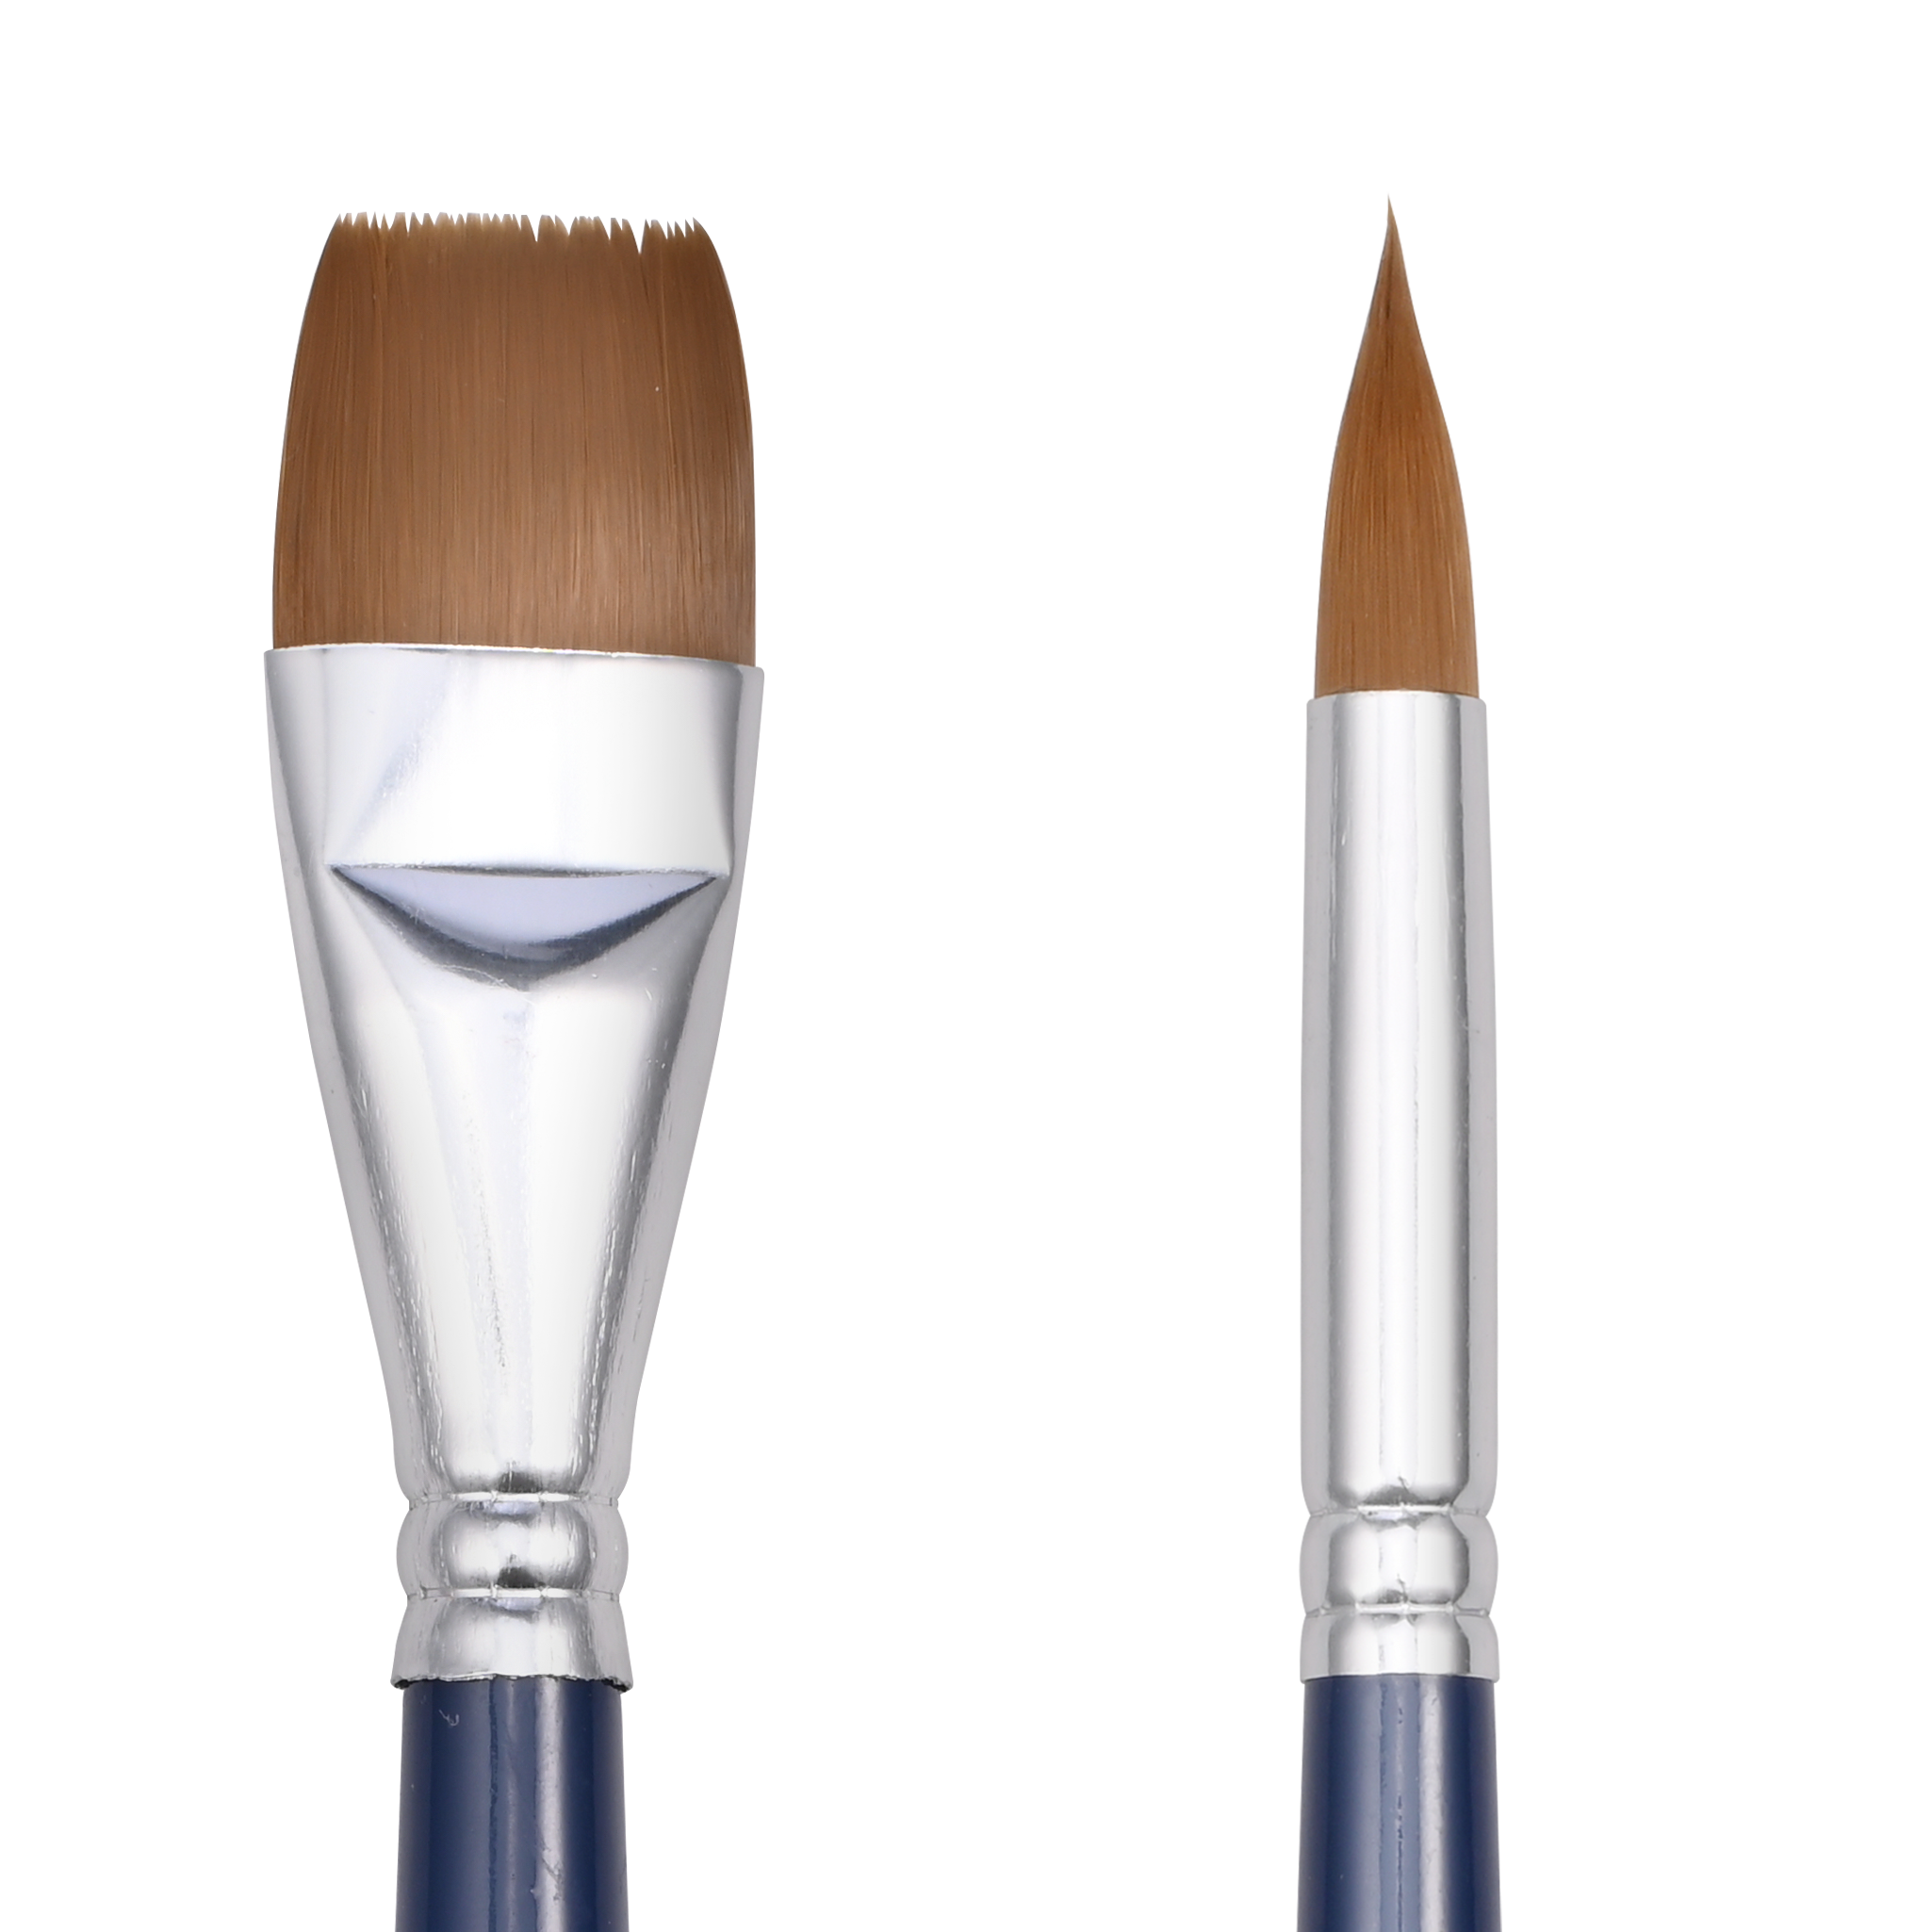
II. Face paint brush
We designed the Bolt Brushes with the needs of the face painter in mind. We design brushes with medium elasticity, easy-to-grip handles and the right length to control your strokes. Over time, you will discover that different painters prefer different brushes, but this set of brushes will help you get started and have the brushes you need for line work (pointed round brush) and for use with the split cake (flat brush) :
Your basic brush shape is:
Round brushes: These are fine-pointed brushes that you will use to draw all the lines and details. You can create Outlines to shape designs and use them to add details. They are basically like pens or pencils, used to draw designs.
Flat brushes: These brushes are flat rectangular brushes, they can be used to apply the base color because they have a larger surface, so they can apply more skin faster than using a round brush, they can also be used with a split cake, using the 1 stroke technique for painting. We'll talk about that later.
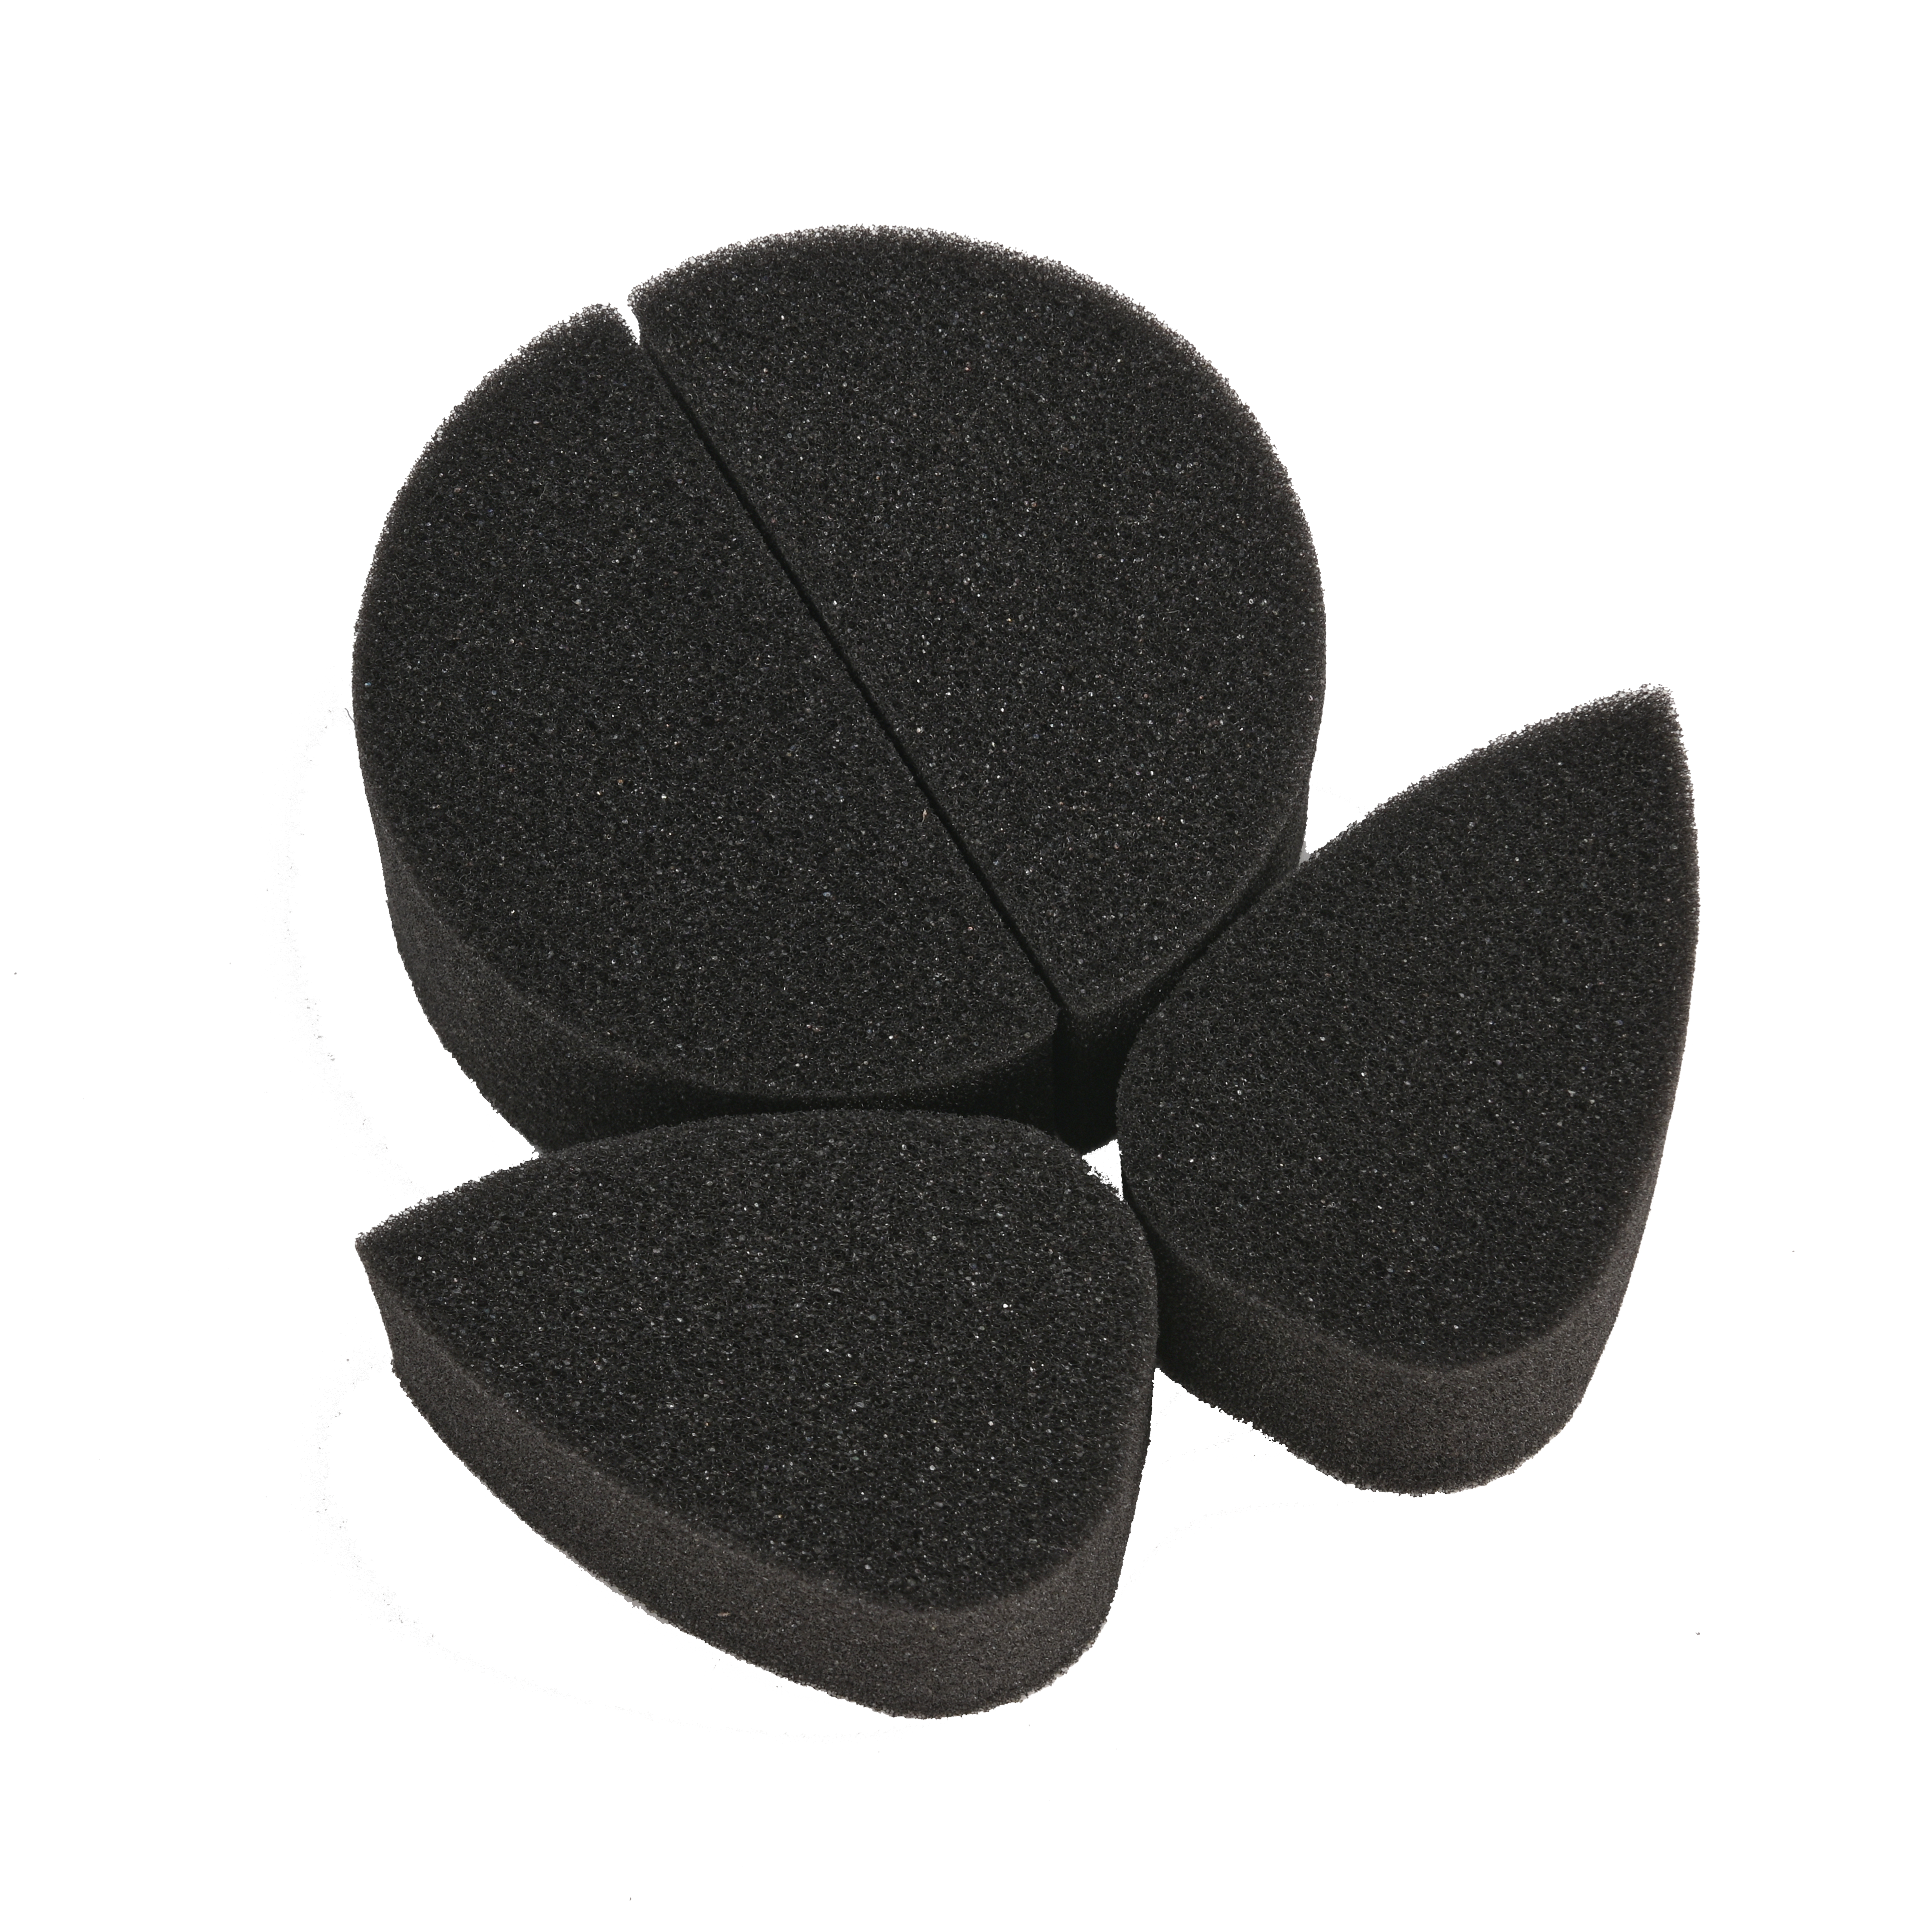
III. Face painting sponge
Most of the basic work (that is, applying paint as a base for the design) is done with sponges. Face painting sponges are designed to feel comfortable to the touch but also strong enough to activate the pigment.
At any event, I keep more than 50 sponges in my sponge bag and usually carry at least two types of sponges: semicircular and petal-shaped.
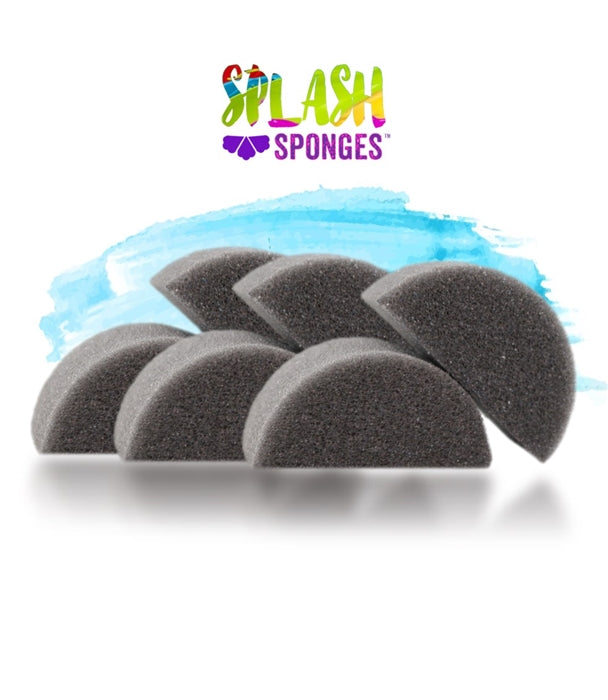
You can start with a simple set of semi-circular sponges, and later you can add special shaped sponges, but for now, when you're just starting to learn how to do face painting, this set of sponges will do the job:
10+ in stock!
Sponges come in several different shapes, the three most common are listed below:
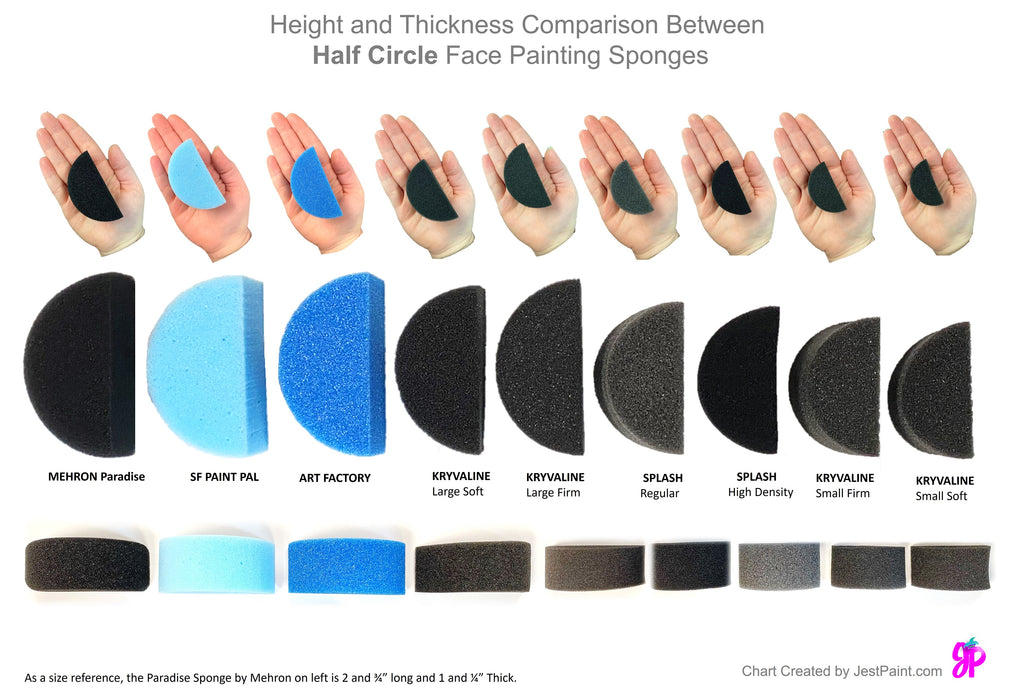
Semicircular sponge: This is the most common and versatile sponge, perfect for laying bottoms, creating sharp edges, and blending colors smoothly. Some are high density, some are medium density, the choice is in your hands, the higher density will be stronger, but both work well.
Full round sponges: These sponges are particularly good for body painting because they can cover large areas of the body very quickly.
Teardrop sponge or petal sponge: Especially suitable for making butterfly wings.
IV. Cosmetic grade glitter
Even for beginners, no face painting set is complete without glitter! When used correctly, glitter can enhance any face painting pattern. For those who are just beginning to learn how to face paint, they may feel that the more glitter the better, but this is not the case. The key to using glitter is to use the right amount in the right place. Too much glitter will blur your pattern. Too little, and it may not stand out as much as you'd like.
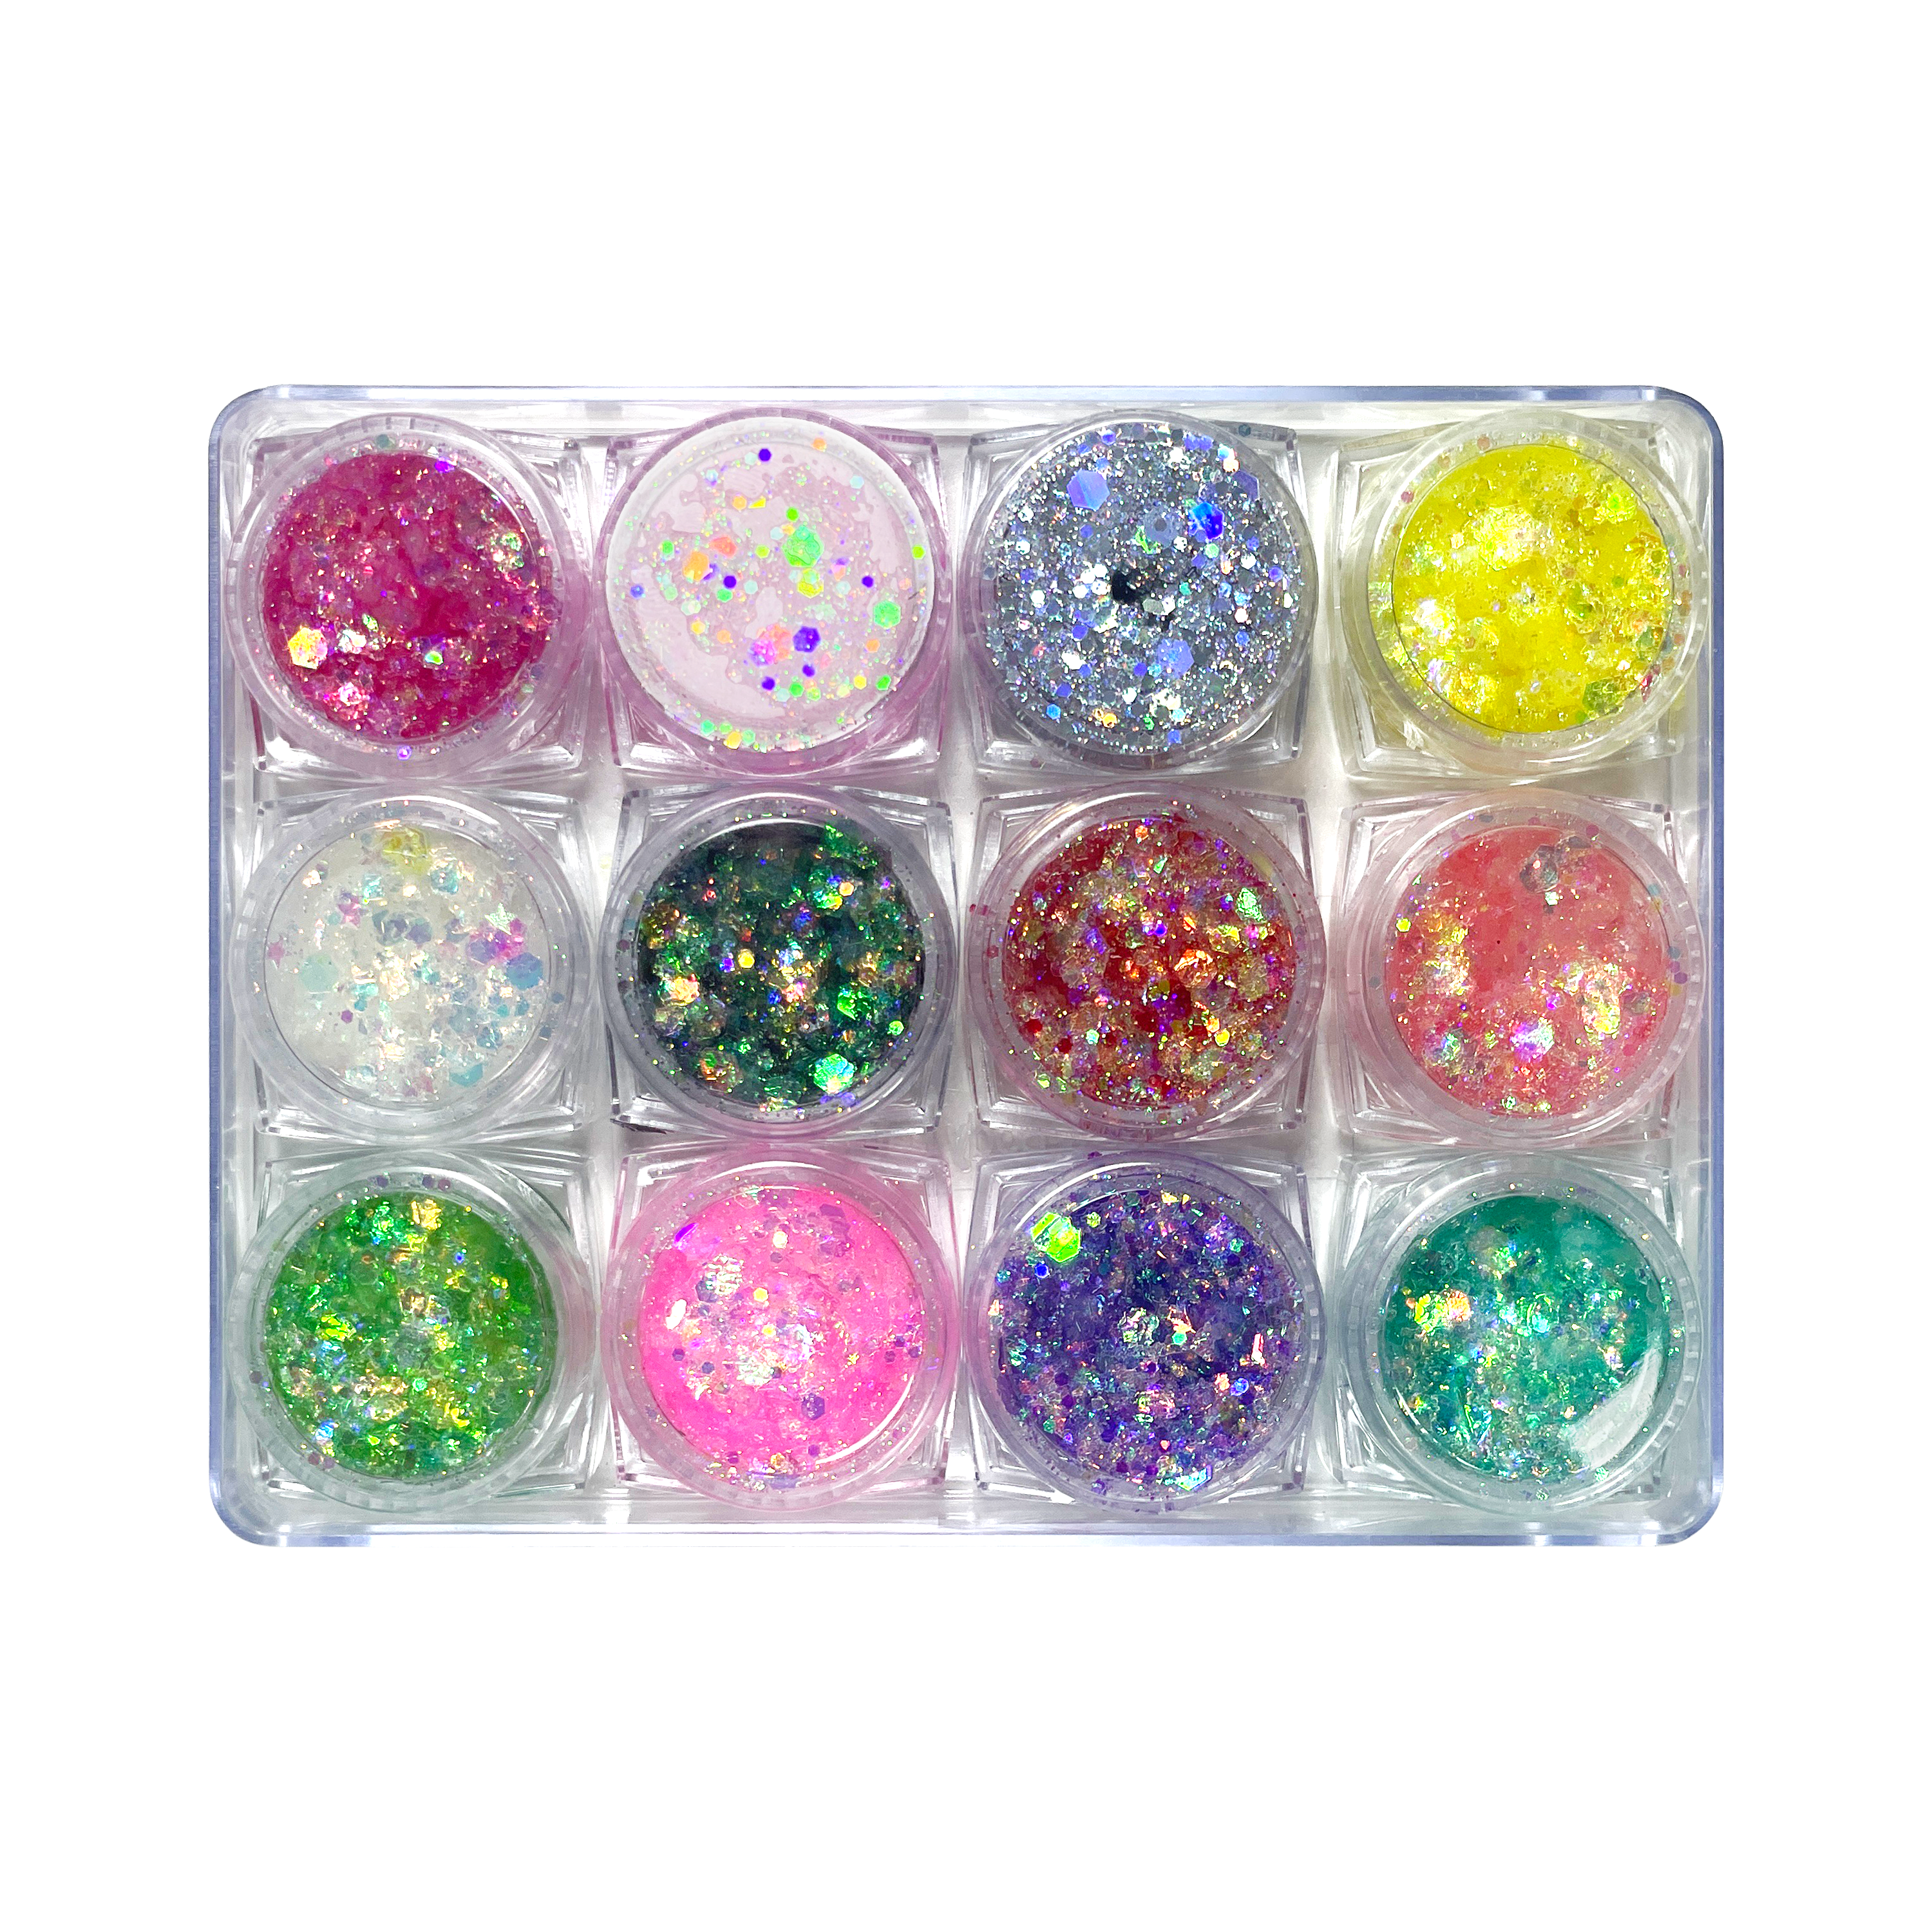
here are many types of glitter, we will introduce some basic types:
Fine glitter: This is the most basic and common type of glitter. This glitter comes in a jar, soft bottle or pump and can be sprinkled over the pattern.
Glitter gel: This is the second most common type of glitter, which can be small loose glitter mixed with the gel base, or large pieces of glitter mixed with the gel. It can be applied to or around the painted area. If applied, it must be done carefully and gently so as not to activate the facial paint underneath and ruin your design.
Glitter cream: These are tiny loose glitter or large chunks of glitter that mix with the wax base and don't smudge the pattern underneath. They are one of the latest trends in face painting glitter.
Now that we've covered the main forms of flash, we can discuss what kinds of loose and large flashes exist:
Holographic flash: This flash can reflect a variety of colors.
Translucent glitter: This glitter allows light to pass through, so it doesn't completely cover your design, for example, and is perfect for applying to butterfly faces. Holographic white glitter is translucent and holographic and is the most commonly used glitter.
Opaque shine powder: This shine powder is mainly used for shine powder tattoos because it is opaque and can cover anything underneath, but it is also perfect for use as an embellishing for face paint patterns. For example, you can use it as an eyeshadow, or apply it to your lips, or use it with a heart or star template to add some detail to your pattern.
Fine glitter: Is the most common type of glitter, feels almost like powder, and is easy to apply.
Bulk glitter: These are larger glitter particles that produce different bold effects.
Biodegradable glitter: All of the above forms of glitter are also biodegradable. They are usually made from corn-based or eucalypton-based polymers. They tend to be considered more environmentally friendly because some glitter breaks down when exposed to fresh water, while others can be composted in industrial facilities.

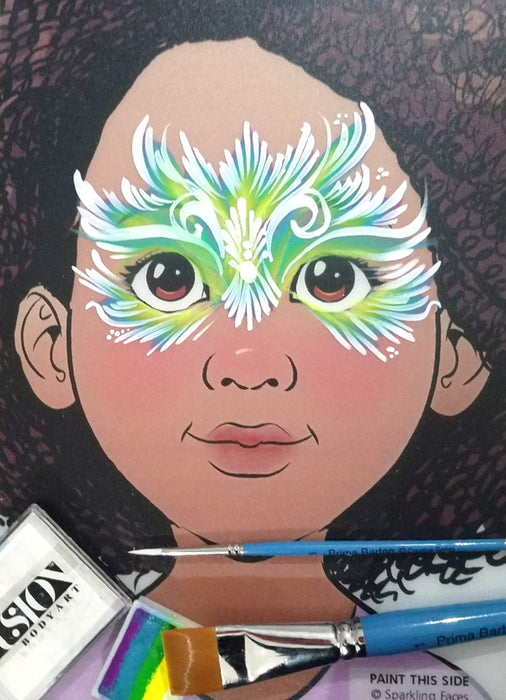
Five, practice board
In order to learn how to do face painting, you need to practice, and sometimes it's hard to find someone to practice with, so we recommend getting a practice board.
There are several face painting exercise boards on the market, the most popular of which are colored. While the proportions on these boards aren't 100% realistic, the textures are different from the skin, and you're missing 3D elements, if you don't have anyone to practice with, this is your second choice. They are very easy to wash off and you can take pictures of your designs and make incredible design boards for your clients.
5 pieces in stock!
You can also practice on arms and legs, but eventually you'll need a face to draw. With a little more practice, you'll be able to draw your own face.
6. Water Bucket
You don't need to get too fancy, as it's just for rinsing brushes and sponges. We recommend using a wide one so that it is stable and not too deep, as you don't want the water level to be higher than the brush ferrule.
If you can't find the right thing, here's a good option:
This is an especially great system because it allows you to have clean water every time and hide the dirty water in the reservoir below.
VII. Brush holder
The brush holder is designed to protect your face painting brush and allow you to easily and orderly access to brushes while painting. We highly recommend that you purchase one as it will help you protect your brushes and keep them in good condition for a longer period of time.
There are several good options, and this is the one we use most often:
8. Baby wipes
Baby wipes are just one option, not always the most environmentally friendly, but sometimes the most practical. When sponges, soap, and water are not readily available, we use baby wipes to wipe our faces or boards.
Keep in mind that if you use baby wipes on your skin, they should be odorless to reduce changes in allergic reactions, and never use them to clean face paint surfaces, as they can leave small fibers on the face paint blocks.
If you're practicing at home, it's best to just use a face painting sponge with some soap and water to clean the exercise board or skin.
VIII. Templates
Templates are great tools, but they do take some practice because they have a longer learning curve than regular face painting. Face painting templates come in many shapes and sizes, and you'll find some are better suited for body painting, some for full face designs, and some just for embellishment. Most face painting templates are made from a thin reusable plastic called a Mylar, and they are flexible enough to bend around the face or body as needed.
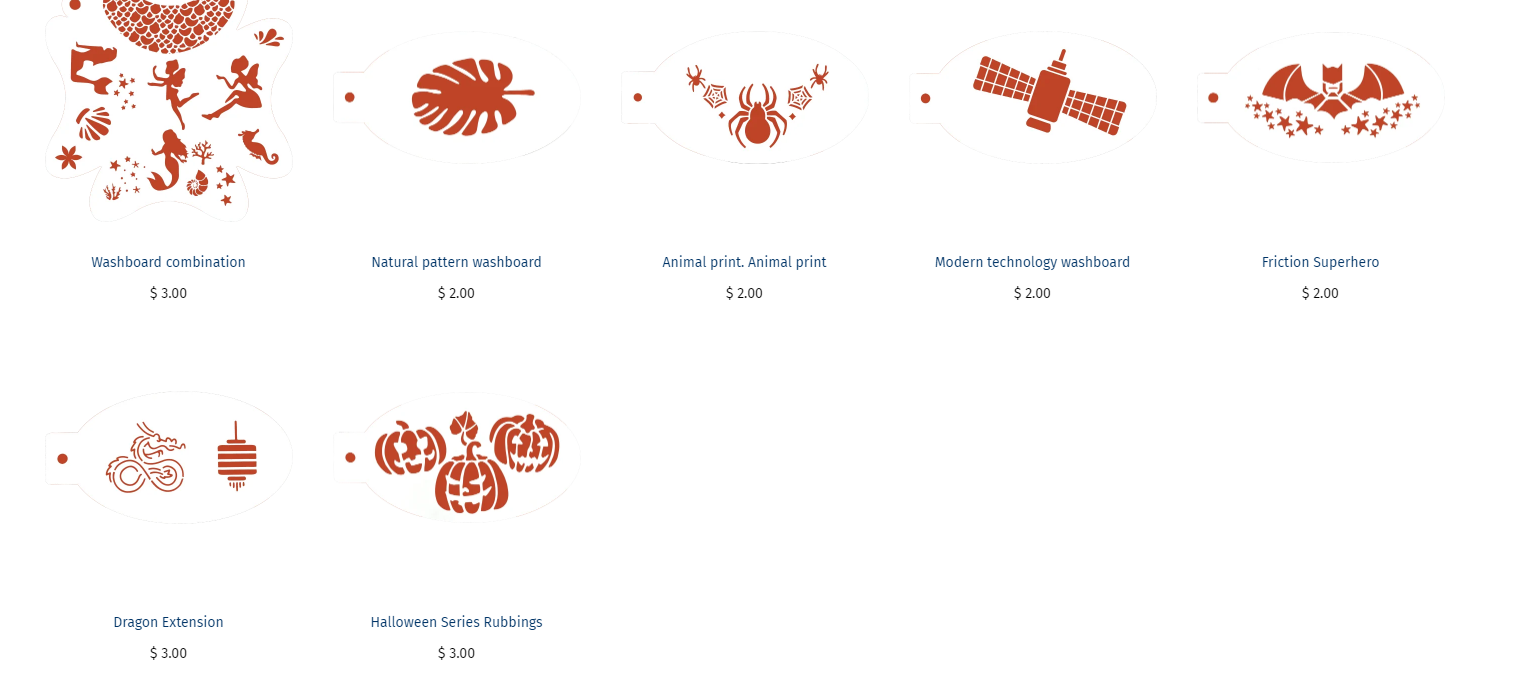
If you are just starting out, we recommend that you first master basic face painting skills before you start working with templates.
IX. Divide the cake
We put splitting the cake at the end of the list because these do require some extra practice and may not be the best way to get you started. Splitting cakes is fun, and just a few strokes can help you create stunning designs, but they require a clear understanding of how to properly load your brushes and sponges, and proficiency in using them.
Split cakes come in several sizes, but the most common are 50-gram and 30-gram split cakes.
2 - How to use face paint and tools
A. How to activate facial makeup with sponges and brushes
Activating face painting is simple. We will focus on water-activated face painting. All you need is some water and a face painting brush or sponge.
For sponges, wet the tip of the sponge first, wet only the tip, and then wipe the sponge back and forth or in a circular motion on the surface of the face paint cake until you see that the consistency of the paint is creamy and the sponge tip has a good load.
For the brush, simply wet the entire bristle area of the brush, rub excess water onto the edge of the water container, and then gently move the brush onto the face paint pie to activate the face paint. The consistency should be creamy and you should notice that the brush is covered in paint before you can use it.
B. How to activate Rainbow cake and split cake
Activating a split cake is just as easy as activating a regular solid color, but you have to remember that since you have striped colors, you can't rotate your brush or sponge, the motions should always go back and forth in the direction of the stripes, and you should always reload them to ensure that the original colors are aligned (between your sponge or brush and the cake).
Also, if you hold the cake in a vertical (top to bottom) manner, excess water will run down the stripes and not mix the colors on the cake. Conversely, if you hold the cake and the stripes are level with the ground, then excess water will pass through the stripes and make the cake dirty.
C. How to load face painting brushes and sponges.
One thing is activation, and the other is getting the proper load to do face painting successfully.
When using a face painting sponge, be sure to wet only the very top of the sponge. The water will be sticky on the sponge anyway. If there is too much water on the sponge, make sure to forcefully squeeze all the excess water off the sponge before you start applying the face paint. Once you feel the amount of water is right, you can start wiping the sponge back and forth or in circular motions until you notice that the paint has a creamy consistency and the tips of the sponge are fully covered. Then, the paint is tested on the arm to make sure it doesn't flow. If the paint comes out nice and creamy and the overlay is opaque, then you're good to go! If it feels slightly dry and it is difficult to remove the paint from the sponge, add a little water to the tip of the sponge and repeat.
When using a face painting brush, make sure the entire bristles are wet, but avoid getting water between the ferrule and the handle, or the handle may eventually start to loosen.
Once the bristles are wet, wipe off excess water from the edges of the water container, then continue rubbing the brush in circular motions (if a round brush) or back and forth (if a flat brush) on the face paint cake surface. When the paint is creamy, wipe the edge of the face paint container with the edge of the brush to remove excess paint, then test on the arm. If it is too thin, return to the face paint pie and continue activating the paint, which will allow the excess water to mix with the paint. If it is too dry, submerge the brush tip again and reload. Test again, and then start drawing.
D. How to perform the basic sponge technique:
After practicing a few times, using a face painting sponge is easy. You can use a sponge base and mix colors. There are other sponge techniques, such as stippling and painting with a sponge edge, but this requires more advanced techniques that we won't discuss right now.
First, lay the foundation
To base, simply fill the sponge with the instructions above, then gently pat the sponge until the desired coverage is achieved. Before you start laying, you need to consider the shape of the design. If it's tigers, butterflies, superheroes, etc. The base color shape will vary depending on the design you want to draw. It's a little different from the way we were used to drawing as children because we were used to filling in lines. Here, we start with a primer and then outline the design, so don't get frustrated if it seems complicated at first, it's a matter of retraining the brain.
At first, you can draw the outline lightly in white, so that you can draw the base color more easily later. This is only to be used as a guide until you master the muscle memory to draw the base color without any guidance.
You can also use a Kabuki brush or flat brush as a base. We'll cover how to use flat brush and 1 brush techniques below. But for now, using a sponge is a good way to start.
Two, mix colors
Palette is fairly simple. The best option is to use glycerine-based topcoats such as Superstar or Paradise, as they take longer to dry and are therefore easier to mix.
You can apply one color to the sponge and then another color next to the first color, so that both colors can be applied to the sponge at the same time, and then both colors can be applied to the face at the same time; Alternatively, you can apply one color first, apply it to your face, then apply the second color with a new sponge (or rinse the first color and reapply it) and apply it to your face, mixing the two colors in the middle by gently patting the edges of the first color with the sponge until you get an even, soft blend.
If you use a rainbow cake and sponge, you can easily load two or more colors at once and get the perfect blend with little effort.
E. How to do the basic stroke technique
Now that you've mastered the sponge, it's time to master the face paint brush. You can think of your brush as your pen to draw patterns, add details, and outline. However, there are many brushes out there, some of which are not actually good for outlining, but are used to create shapes or load specific types of face paint. Let's take a look at the different things you can do with a face paint brush so you can learn how to do face paint.
First, how to outline
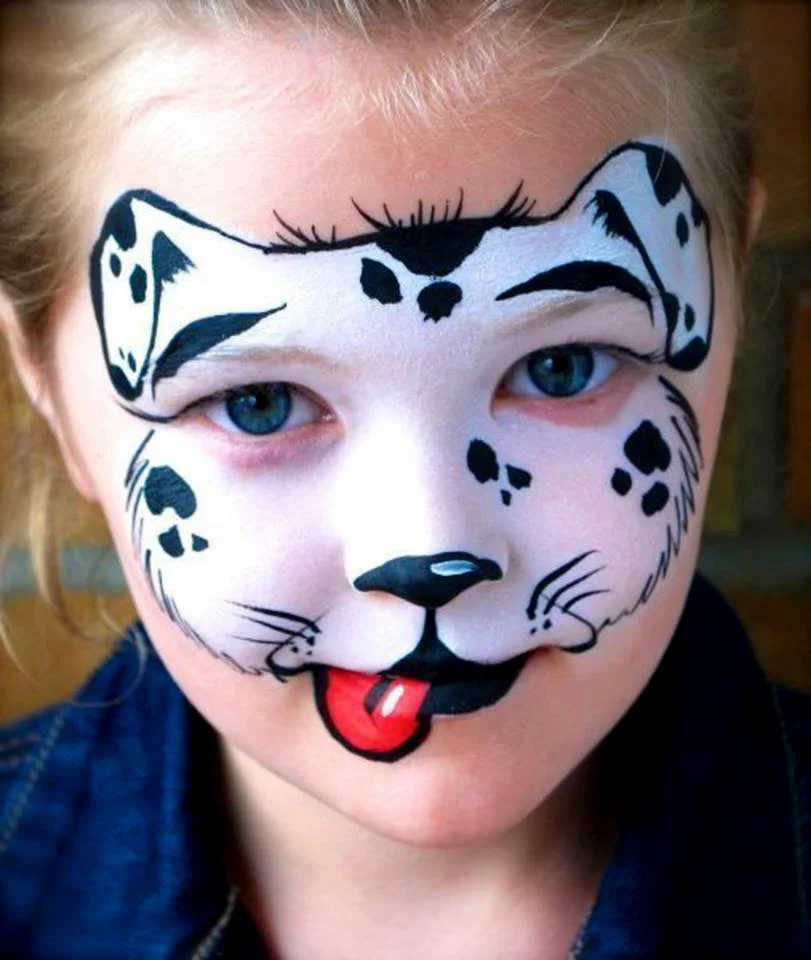
Outline is the second part of most face painting designs. If you don't have an art background, it can be a more challenging time to learn how to do face painting, but with patience and practice, you'll improve in no time. I suggest you pick a simple design first, like the one we have at the end of this post, and then try it out before trying something more complex.
When you first pick up a brush, you want to try some exercises:
Separate the two points and connect them with a straight line.
Draw parallel lines.
Make evenly spaced spirals.
Draw dots, from small to large, and then from large to small.
Face painting brush training
These simple exercises will teach you how to control the brush. Then, you can start mimicking simple patterns like hearts, stars, flowers, just to test your wrist movements. While you'll tend to focus your gaze on the end of the brush at first, you'll get better results if you focus on where you want the brush to go, rather than where the brush has been all along.
Two, how to draw tears
Teardrops are a face painter's best friend! They can make almost any design look better, but they're not easy to master, so have a little patience when making them. The teardrops we drew at first all looked bad, but you can master them, I promise!
You must start with a round brush, and a brush that is not particularly sharp is even better.
The first thing to know is that you can comb from beginning to end or from end to end, there is no infallible right way, either way will work, depending on which method is easier for you. However, if your brush is too sharp, it is best to comb it from the end to the end, otherwise the head (round) part of the teardrop will also have a small pointed point.
How to draw tears
If you want to brush from the tail to the head, you have to think of the brush as a landing plane, with the tip of the brush landing first, and as you move your hand forward, you start to press down until the entire brush lands. Once the bristle part near the brush head touches the skin, you will see a tear drop. You need to practice them a few times to master them.
If you want to work in reverse, start by gently but firmly pressing the entire brush against the skin, then slowly pick up the brush while dragging the brush head a little further along the direction you picked it up to create a teardrop tail. Thus, the end of the brush will be dragged across the teardrop-shaped head to form a tail.
Note that most of the time, tear drops are added to the design in odd numbers, i.e. in groups of three to five, which creates symmetry. When doing this, make sure to make the middle teardrop the longest and the side teardrop smaller, either make the first teardrop larger and the bottom teardrop smaller and smaller, or conversely, make the first teardrop smaller and the bottom teardrop larger and larger. Just don't make them all the same size or they'll look weird.
How to draw thin lines to thick lines
It is very important to outline the design with lines, and lines are a very important part of the design, so the fluency and beauty of the lines are also important. One of the best tricks to make a design more interesting is to use lines of varying thickness, which can be thinner, then thicker, then thinner again. To do this, you simply change the amount of pressure applied to the brush. For thin lines, try to apply very little pressure on the brush and use only the tip of the pen; For thick lines, apply more pressure to the brush so that most of the bristles are pressed against the skin as you drag the brush.
How to draw thin lines to thick lines with face color
You can do this with a round brush, a 1/2-inch flat brush, a dagger brush, or even a script serif brush, but we highly recommend practicing with a simple round brush (probably a No. 3 or No. 4) first until you can master the trick.
IV. How to make a Starburst
Starbursts can be challenging for people just starting to learn face painting, but with a lot of practice, you should be able to do it quickly.
How to make a starburst effect with face paint
Choose a thin round brush, preferably a No. 2 round brush with a pointed tip. Draw the stars from the center. Apply a small amount of white face paint to the face paint brush, then gently press the tip of the brush and drag it out about 1/4 inch. Repeat the same action, starting from the center and drawing outward 5 times, following the normal star drawing method, you can draw the star.
5. How to Paint with cake fragments
Face painting with a split cake is probably one of the most exciting things to do with face painting. You can see the rainbow flow on the brush as if by magic! Once you have mastered the technique, you will jump on one foot.
First wet it with a flat 3/4 inch brush, then rinse off the edges of the container with water to remove excess water. Then, grab the divided cake vertically and move the stripes up and down, starting to move the flat brush up and down until the brush is full. If you see the brush dripping, go back to the rim of the glass and scrape the brush off to remove excess water before returning to the cake. As long as you hold the cake vertically, the color will not become cloudy. Once the paint is creamy and the brush looks full, test the paint on your hand to make sure it doesn't run. If it is, you can tap the tip of the brush on the paper towel to absorb the excess water, or continue to mount the brush on the cake until the topcoat becomes creamier.
How to apply cake pieces to the face
Now it's time to paint, first gently press the brush against the skin, then move it up, down, or sideways depending on the direction you want. For example, you can practice starting at the corner of your eye and then drawing a curved line along your eye toward your eyebrow. In this case, you need to first press the edge of the brush against the skin as if the brush were standing upright, then rotate the brush so that the entire surface of the brush is pressed against the skin as you drag it up.
With enough practice, you can use them to draw leaves, flowers, ribbons, and even entire faces. Please download the exercise sheet below and print it out. Put a piece of acetate on it and practice your strokes
VI. How to use a petal or flower brush
A petal or flower brush is a very interesting tool, even for those who are just starting to learn how to paint faces. I highly recommend you buy one to play with, you'll be glad you did!
Usually we like to paint these brushes in two colors. We start by painting the brush with a light color (such as white), from the tip to the end, just like with a round-tipped brush. Then, we moisten the nib slightly and apply a darker color (like red or blue), but only on the nib.
How to use a petal brush
Once installed, press down on the skin from the tip until you leave an imprint like a petal. The more you press, the wider the petals will be. Now go around the same center point and distribute five petals evenly around the center point so that you have a very beautiful flower.
It takes a little practice to draw evenly sized petals, but you can definitely do it. You can purchase large and small petal brushes to draw flowers of different sizes, or simply apply pressure with the brush.
VII. You can use different brushes (round, cursive, flat, hazelnut, corner, petal) to stroke.
F. How to use face painting templates
Working with face painting templates takes some practice, and we have a full blog post about it: Face painting with stenciling - Instructions and a guide to the best stenciling, but the basic idea is that you should press the stenciling firmly against dry skin (make sure there is no wet paint underneath) and then use an almost dry sponge or kabuki brush to gently paint over the stenciling surface until the desired area is covered. Before painting the stencil, be sure to test a sponge or brush on the skin to make sure it is almost dry, if it is too wet, the paint will seep under the stencil.
G. How to use face paint glitter
When using glitter, keep in mind that glitter should enhance your design, not make it too prominent. If you are going to sprinkle glitter on the design, we recommend that you sprinkle glitter on it before you outline it. This way, the glitter won't blur the outline.
If you are adding glitter cream or gel, you can use this as a final step, always making sure not to activate the paint so as not to ruin your design.
You can use a thin glitter gel with a plastic nib to outline your design as a different option.
Whatever you choose, if using loose glitter, ask your customers to close their eyes before applying it, and be sure not to use large chunks of glitter near their eyes to prevent it from getting in.
3 - Face painting cleaning, storage, safety and hygiene tips
Keeping your face painting tools clean is very important, not only to make you paint better, but also to protect your painting tools and extend their life. On top of that, if you're going to be painting for the masses, keeping your face painting tools clean will prevent disease from spreading among your customers.
Here are some basic things you should know:
I. Be sure to clean the kit after use: wipe the surface of the cake with a clean sponge and water, and then let dry. Do not use baby wipes as they will stick the fibers to the cake. Let the cake dry completely before placing the lid on it.
II. Wash the brush: Wash the brush well with some brush cleaner, rinse thoroughly, and then let the brush hang upside down or on a towel to dry. Do not store the brush upright while it is still wet, or water will run down the bristles into the ferrules and loosen the glue holding the brush in place.
III. Wash the sponge: Soak the sponge in soap, wash it thoroughly, and then put it in the dryer so that the sponge can dry quickly and not be left to dry slowly in a damp area.
Never paint on broken or damaged skin: To avoid spreading disease, you should always paint on healthy, clean skin.
V. Use only one sponge per child and clean brushes thoroughly between uses: Not every face painter uses the same practice, but we believe it is safest to use only one sponge per child and never reuse the same sponge, and one brush per child and never reuse. Sponges can come in hundreds and they are cheap to use one at a time and then throw them back into the sponge for cleaning later. Brushes, which can have several pieces of each type, are rinsed thoroughly after each use, sprayed with 70% alcohol and allowed to dry completely before use. You can store all face painting sponges in a sponge mesh bag.
VI. Wash your hands: Keeping your hands clean and washing your hands before serving customers will help you stay healthy and prevent spreading disease to others.
Be sure to use the right products: As we mentioned above, it is very important to use the right face painting supplies. Never use acrylic or tempera paint, never use craft glitter, avoid scented baby wipes or any other product that has not been designed and tested for everyday skin use.
4 - Face painting set maintenance tips
Taking good care of your face painting tools is the key to extending their life and saving money. Now that you know how to care for your face painting tools, we're going to cover some tips on keeping your brushes in good condition.
Here are a few basic things you should keep in mind:
A: Never dip the brush in water beyond the bristles: If water overflows the ferrule, where the ferrule meets the handle, water will get between the ferrule and the handle, which will cause the glue holding the brush in place to loosen and eventually cause the brush to fall apart.
Brush care tips
B. Do not stand the brush on the bristles: When painting, be sure to rinse the brush and then place it on a paper towel or cloth, or stand the bristles up to prevent the bristles from bending under pressure.
C. Load the brush carefully: When loading the brush, make sure to do it gently, if you press the round brush hard on the cake instead of making a gentle circular motion, you will eventually damage the brush.
D. Store brushes in a protective box: When you have finished painting and brushes are clean and dry, be sure to store them in a protective box to protect the bristles from any items that could damage them.
E. Never leave your makeup bag in an area that is too hot, too wet or too cold: Face painting is sensitive to temperature, light and humidity. The makeup bag should be stored in a cool, dry and dark place, never put it in the car or in direct sunlight or exposed to wind and sun (such as the porch). Face paint can melt, freeze, and become very soft and moldy under the wrong conditions.
5 - Face painting practice tools and techniques
One of the most important things to do well at anything is to have the right tools and practice! Practicing skills, getting new ideas and testing new designs is a key part of learning how to do face painting.
We strongly recommend that you purchase an exercise board to practice as many times as you need. You can even purchase several pieces, at least one side view and one front view, in order to practice the monocular design and the full face design.
It's best to set a time during the week where you can practice. This is your own time. Set aside a small area in your home where you can feel safe and practice at least once a week. If you can practice more often, so much the better!